Today we will learn How to Add Ajax Toolkit in Visual Studio Step by step.
First some introduction about Ajax .
What Is Ajax?
Ajax stand for an acronym for Asynchronous JavaScript and XML) is a group of interrelated web development techniques used on the client-side to create asynchronous web applications.
AJAX is not a new programming language, but a new way to use existing standards.
AJAX is the art of exchanging data with a server, and updating parts of a web page - without reloading the whole page.
With Ajax, web applications can send data to, and retrieve data from, a server asynchronously (in the background) without interfering with the display and behavior of the existing page.
The Following Steps Show you how to Adding Ajax toolkit to visual studio .
1) First You have to download Ajax toolkit from here and extract it.
2) Now Create a sample ASP.net web application project In Visual Studio.
3) After it default.aspx page will be opened. Now go to toolbox on left side and open it.
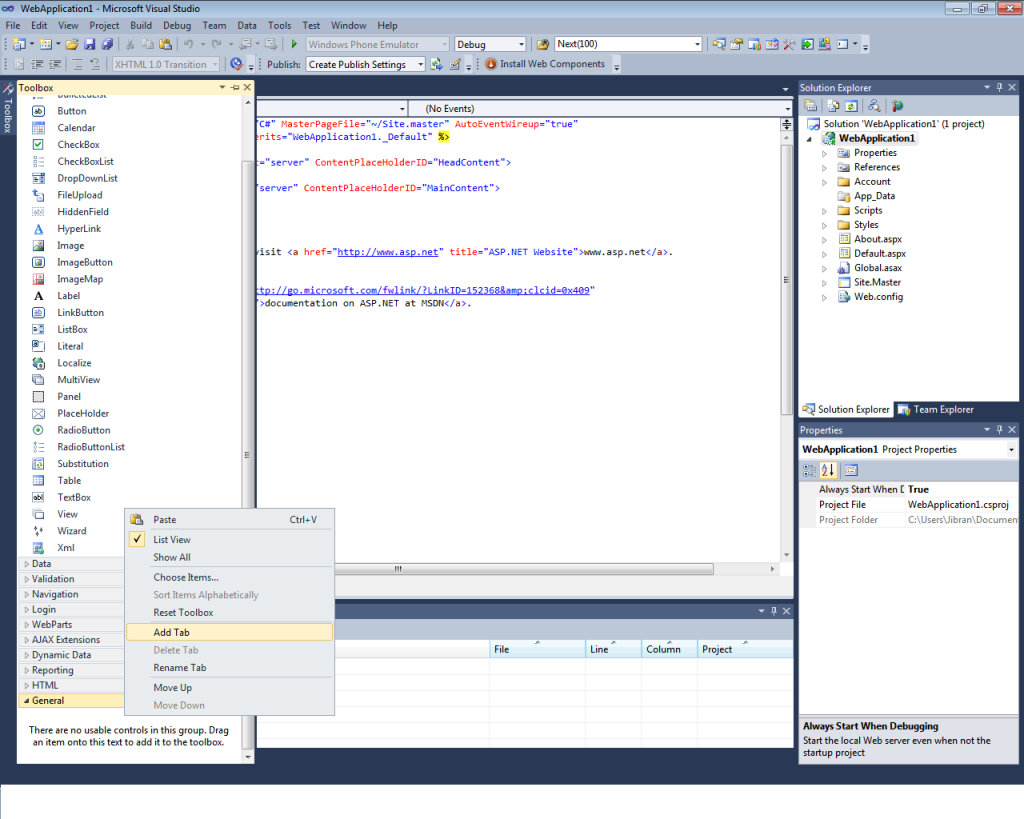
3. Any where inside the toolbox right click on empty space and select add Tab Option.
 4. Name the tab:”Ajax Toolkit“.
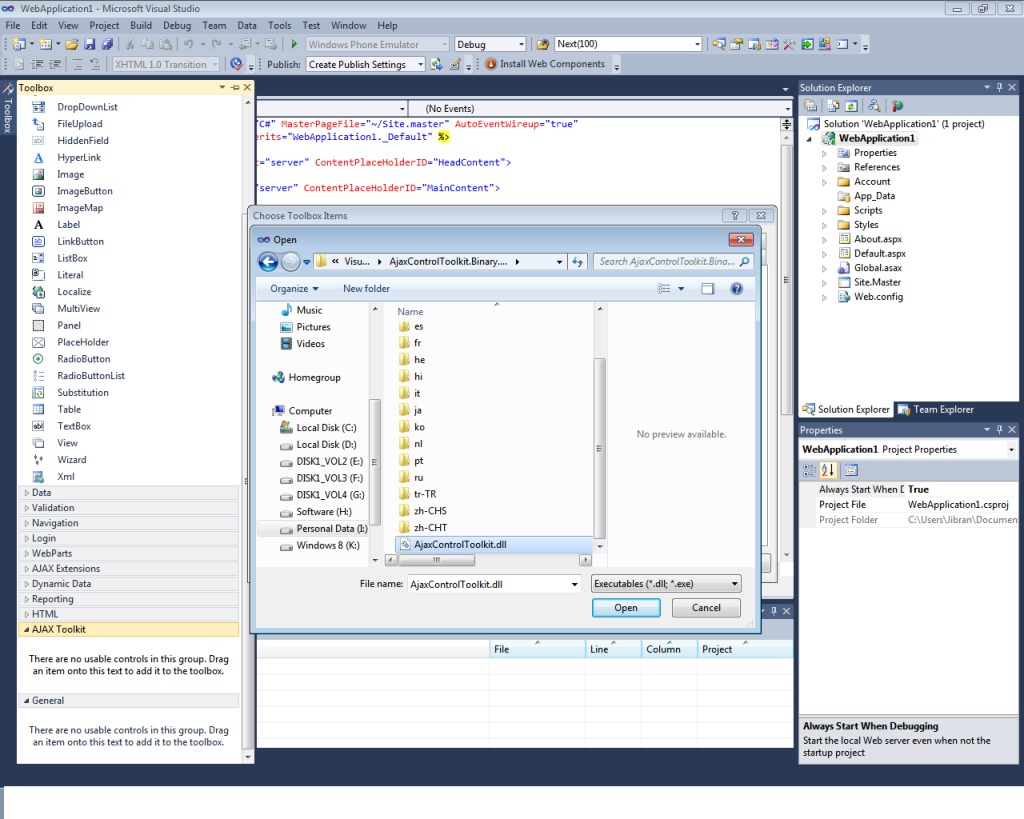
5. Now right click on the newly created tab and select “Choose items“.
6. The window opened will contain browse button click and locate your .dll file of Ajax toolkit downloaded and extracted.
 7. press open and Ok.
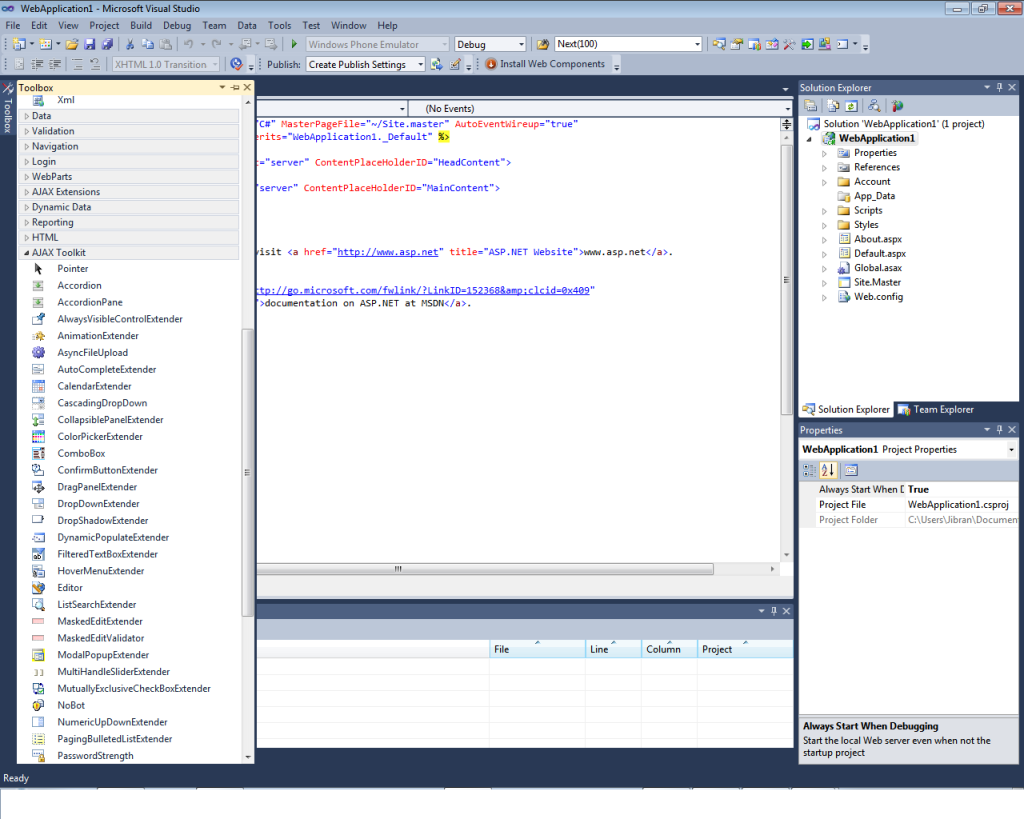
8. Now you can see all the tools and controls are listed inside the caption or tab you created.
9. for using Ajax toolkit controls you will have to add .dll files in references.
enjoy here is the final look.

Full Video On How to Add Ajax Toolkit In Visual Studio.
First some introduction about Ajax .
What Is Ajax?
Ajax stand for an acronym for Asynchronous JavaScript and XML) is a group of interrelated web development techniques used on the client-side to create asynchronous web applications.
AJAX is not a new programming language, but a new way to use existing standards.
AJAX is the art of exchanging data with a server, and updating parts of a web page - without reloading the whole page.
With Ajax, web applications can send data to, and retrieve data from, a server asynchronously (in the background) without interfering with the display and behavior of the existing page.
The Following Steps Show you how to Adding Ajax toolkit to visual studio .
1) First You have to download Ajax toolkit from here and extract it.
2) Now Create a sample ASP.net web application project In Visual Studio.
3) After it default.aspx page will be opened. Now go to toolbox on left side and open it.
3. Any where inside the toolbox right click on empty space and select add Tab Option.
 4. Name the tab:”Ajax Toolkit“.
5. Now right click on the newly created tab and select “Choose items“.
6. The window opened will contain browse button click and locate your .dll file of Ajax toolkit downloaded and extracted.
 7. press open and Ok.
8. Now you can see all the tools and controls are listed inside the caption or tab you created.
9. for using Ajax toolkit controls you will have to add .dll files in references.
enjoy here is the final look.

Full Video On How to Add Ajax Toolkit In Visual Studio.


0 comments:
Post a Comment